Imagine running Facebook ads without knowing if they’re working. Sounds like a shot in the dark, right? That’s where Facebook Pixel comes in! It’s a powerful tool that helps you track and optimize your ads, ensuring you get the best return on investment (ROI). If you’re wondering how to set up Facebook Pixel effortlessly, you’re in the right place. In this blog, we’ll walk you through the process in just five simple steps.

Before jumping into the setup process, let’s first understand what is Facebook Pixel. Simply put, it’s a piece of code that you install on your website to track user interactions. This data helps you measure ad performance, retarget visitors, and create lookalike audiences for better conversions.
Facebook Pixel works by placing and triggering cookies that track users when they interact with your website. It collects data on page views, button clicks, form submissions, and purchases. This information is then sent back to Facebook, allowing advertisers to:
The first step is creating your Facebook Pixel inside Meta Events Manager. Here’s how:
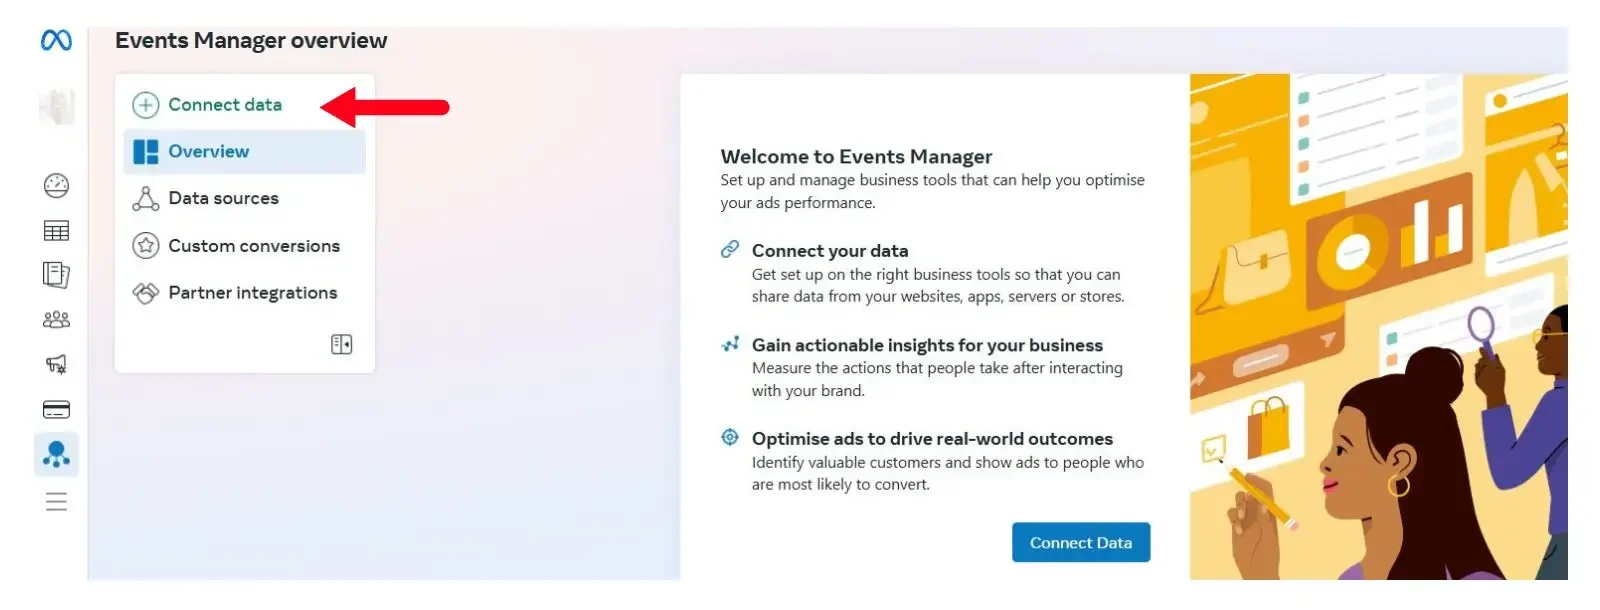
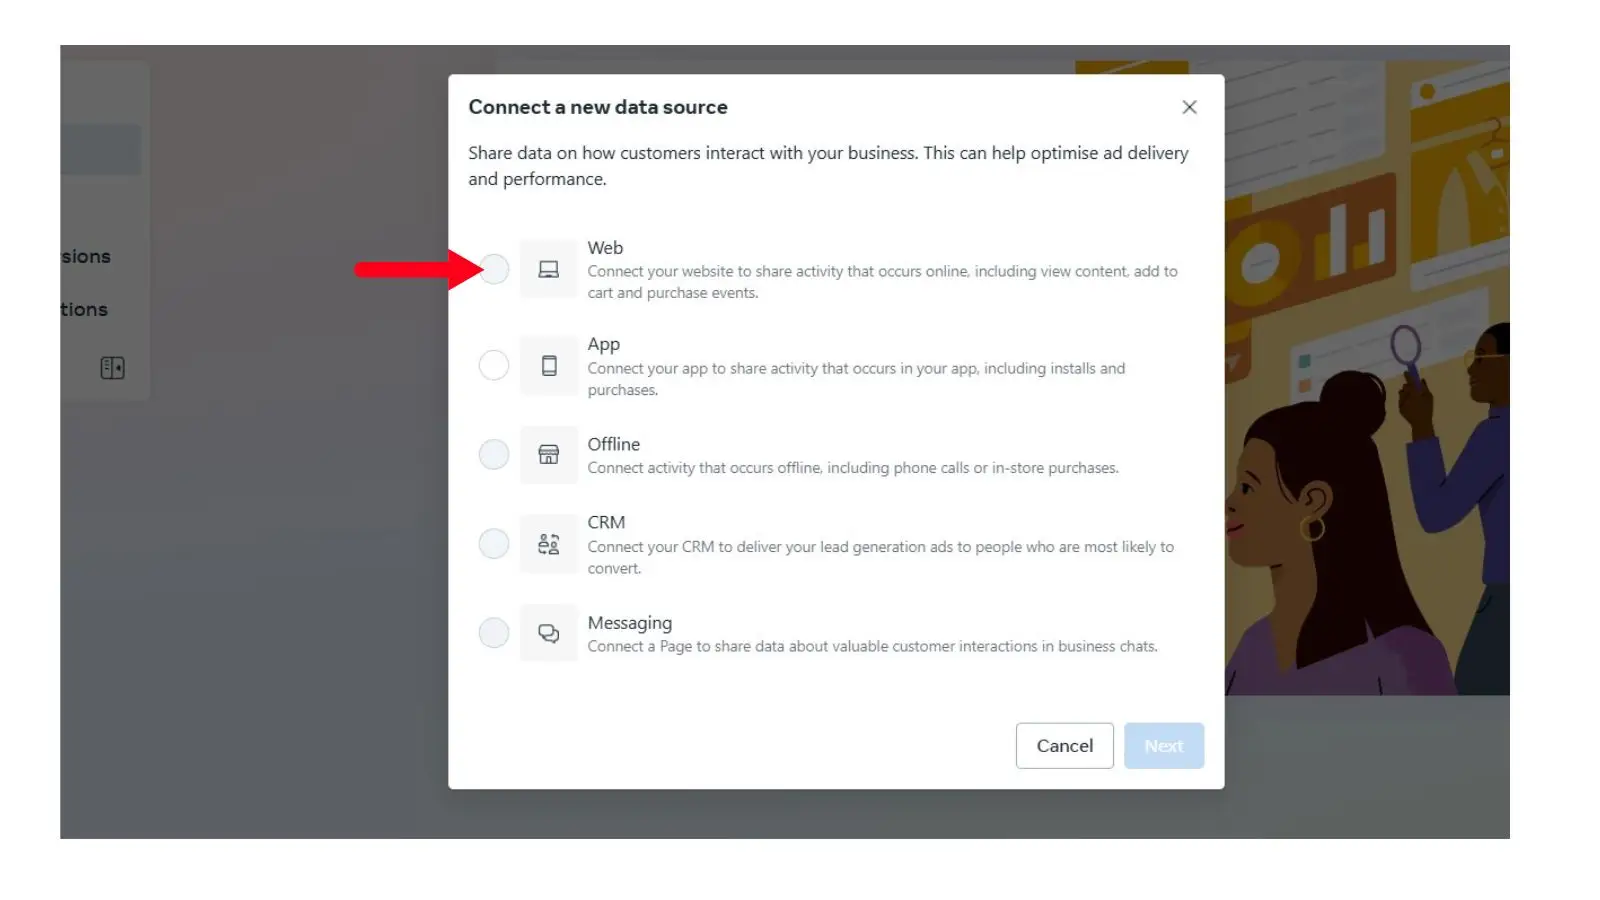
3. Choose “Meta Pixel” and hit “Connect”.
4. Name your Pixel and enter your website URL, then click “Continue”.

Once you’ve created your Pixel, Facebook will generate a unique Pixel ID for tracking purposes. This ID is crucial for linking your website to Meta’s tracking system.
Facebook provides three levels of data sharing:
Select the one that best suits your privacy and tracking needs before proceeding with installation.
Pro Tip: Name your Pixel based on your business name for easy identification.
Now that you have your Pixel, it’s time to install it on your website. You can do this in two ways:


⚠️ Important: Ensure the pixel is placed in the <head> section on all pages for accurate tracking.
To make sure your Pixel is working correctly, use the Facebook Pixel Helper.
If you see errors, double-check your installation or refresh the page.

Facebook Pixel isn’t just about tracking visits; it helps you track actions (events) on your site.
Facebook allows you to track different types of events, including:
If you need more detailed insights, custom events help track unique user actions:
Tip: Proper event tracking allows Facebook to optimize your ads for better conversion rates.
Once everything is set up, you need to ensure that your Pixel is successfully collecting data. Follow these steps:
If your Pixel isn’t tracking, try clearing your browser cache, ensuring the code is placed correctly, and testing again.
The Facebook Pixel Helper is a free Chrome extension designed to help advertisers verify and troubleshoot their Facebook Pixel installation. It detects Pixel implementation errors and provides insights into event tracking.
Setting up Facebook Pixel might seem technical, but following these five simple steps makes it easy. Once installed, you’ll unlock valuable insights, improve your ad targeting, and increase your conversions. Facebook’s powerful AI will use your pixel data to deliver ads to the right people, helping you maximize your return on ad spend (ROAS).
By leveraging event tracking, you can fine-tune your campaigns and retarget potential customers more effectively. Whether you’re an eCommerce store owner, a service provider, or a blogger, the Facebook Pixel is a game-changer for digital advertising.
Got any questions about how to set up Facebook Pixel? Drop them in the comments below!